Navigate in the Schedule View
This guide gives you a quick and easy overview of the Schedule View. It will show you how to navigate the calendar, filter appointments, check provider availability, and customize the view to suit your needs.
You'll learn how to switch between daily, weekly, and list views, adjust the time scale, and apply filters to focus on specific providers, locations, or appointment types — all to make scheduling more efficient and intuitive.
Remember, from the Schedule View, you can also create an appointment directly — as demonstrated in this article ("Create an Appoitment")
Step-by-Step
1. Go to “Schedule” This will take you to the main schedule view, where you can manage all appointments, check availability, apply filters, and much more

2. Click on the location dropdown to select which clinic you want to view

3. Now the view is set to show week by week. Select a date to see appointments for that specific week

4. Use the left and right arrows to navigate between different days or weeks in the schedule using the arrows at the top of the calendar

5. Click here to refresh the calendar. Use this option if you want to update the calendar view and make sure you’re seeing the latest changes

6. This section shows when each treatment provider is available for appointments
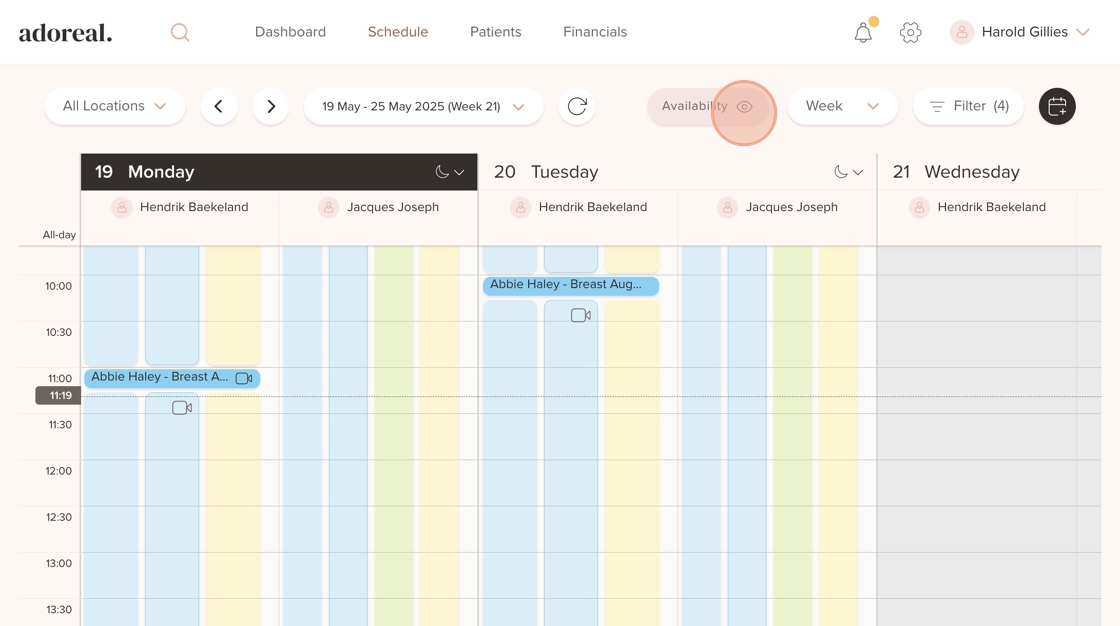
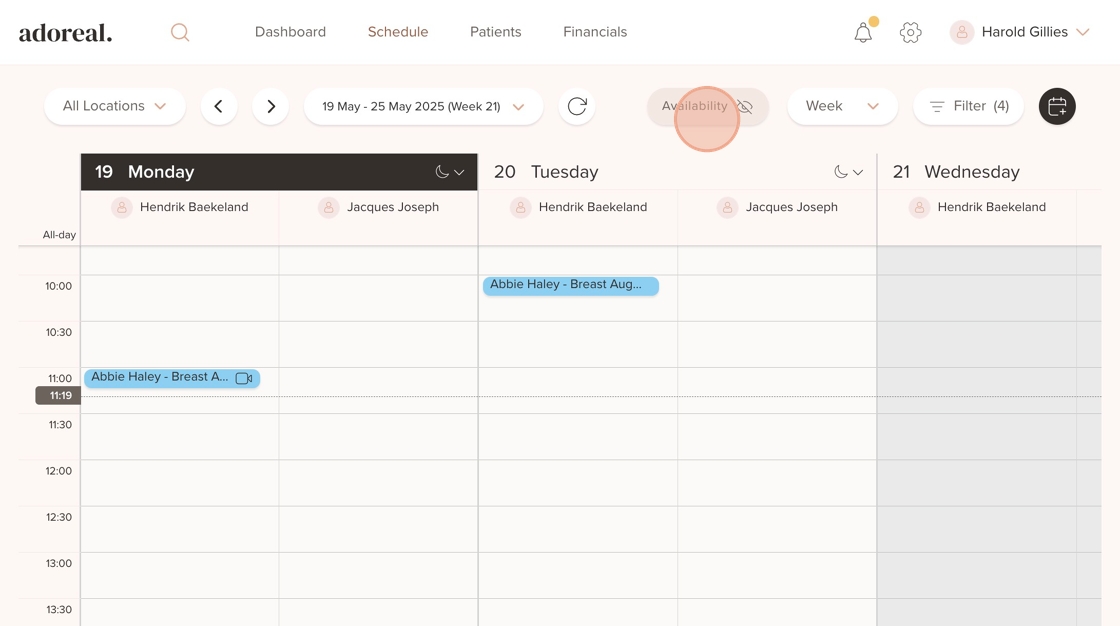
7. When this is turned off, you won’t see the full availability for the selected treatment provider. For example, the colored indicators for different available appointments will disappear from the schedule
8. Click on “Week” to change the view. You can switch between daily, weekly, or list views. Choose the one that suits your preference best

9. The current time scale is set to 30 minutes, so you'll see time slots like 10:00, 10:30, 11:00, and so on. You can change this to 15 minutes or 10 minutes for a more detailed view of the schedule
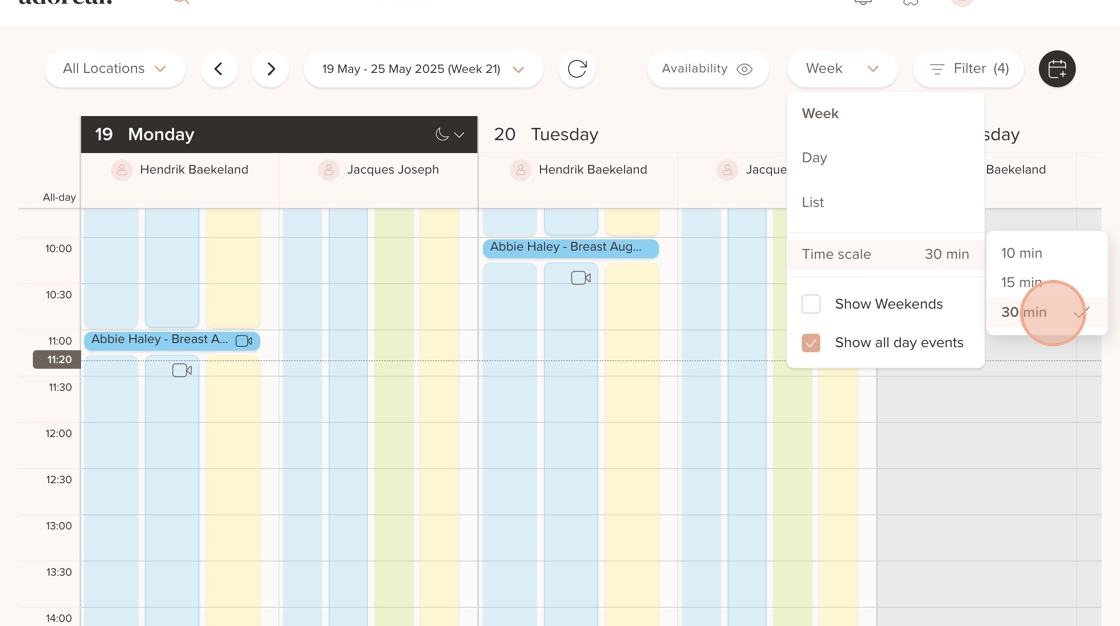
10. Use the “Show Weekends” option to include or hide Saturdays and Sundays in your calendar view

11. Click on “Filter” to narrow down the schedule by treatment provider, appointment type, status, and more

12. Choose a specific provider from the dropdown to focus the view on their availability only

13. Click on "Appointment Type" and pick a specific type of appointment to view only relevant bookings

14. Go to "Status" to see appointments based on their current status, like confirmed, checked-in, or canceled

15. You can click on today's date and see if there are any overnight patients

Was this article helpful?
That’s Great!
Thank you for your feedback
Sorry! We couldn't be helpful
Thank you for your feedback
Feedback sent
We appreciate your effort and will try to fix the article