Create a Consultation Appointment
You can create an appointment with the same setup and functionality from three different areas in the platform:
- From the Dashboard View
- From the Schedule View
- Directly from the Patient 360
This article will guide you through the process of creating a Consultation Appointment from the "Schedule" section. If you are booking an appointment for a surgery, there are additional steps to consider. Please refer to this article to learn more ("How To Make a Surgery Appointment")
To book directly from a patient profile:
Go to Patient > Overview, select the patient, then in Patient 360, navigate to Bookings and click the ➕ icon.
Before you begin, there are a few things that must be set up in advance. Please review the articles below to ensure everything is in place:
- Assigning Services to a Location "How To Add a Service To a Location"
- Add Locations to a Treatment Provider "How to Add Team Member Information"
- Adding Services to a Treatment Provider "How To Add a Service To a Treatment Provider"
- Setting Schedule Availability for a Treatment Provider "How to Set Up Provider Availability"
Step-by-Step
1. Click the icon located in the top right corner

2. Start by selecting a patient. You can either click the arrow to open the dropdown or begin typing in the field to search

3. Choose the patient you'd like to book an appointment for

4. Go to the "Type" field and select the kind of appointment you are booking

5. Click on "Location" to choose where you want to book the appointment

6. Choose the location

7. Continue to the "Provider" field and select the treatment provider

8. Here, you can choose whether to book an on-site or virtual consultation

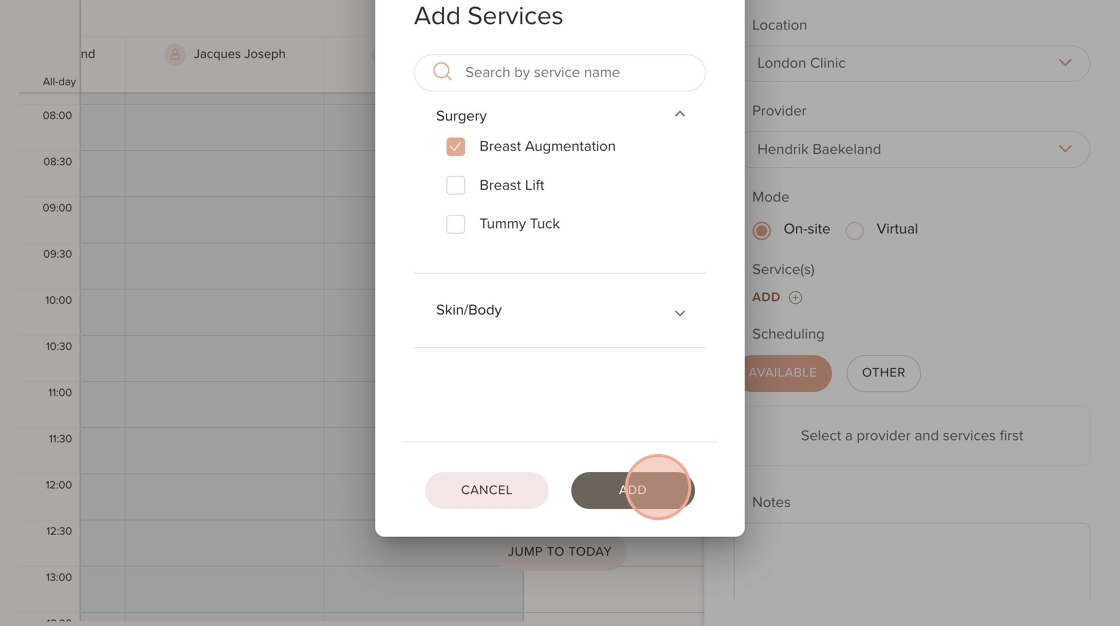
9. Click on "Add" to choose a service

10. Here, you'll find a list of all the services this treatment provider offers at the selected location

11. Select a service and click on "Add"
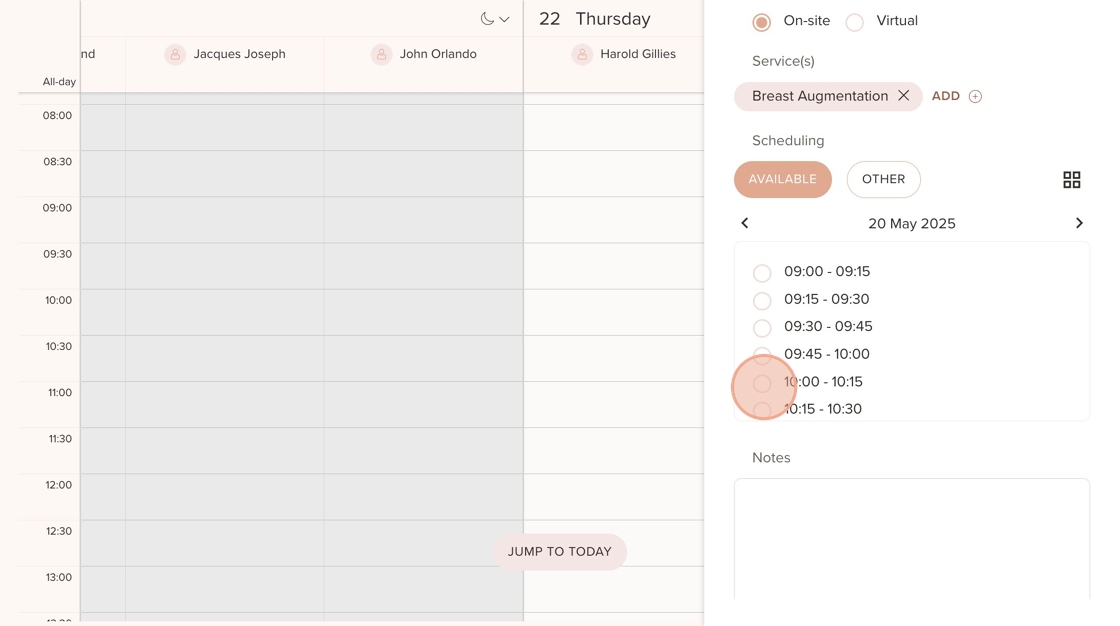
12. Under "Available," you'll see this treatment provider's availability. Select the date you'd like to book

13. Select the time
14. In the background you will now see a glimpse of the booking, seeing that the provider is available.

15. Under "Notes," you can add any information you'd like. This is for internal use only and will not be visible to the patient
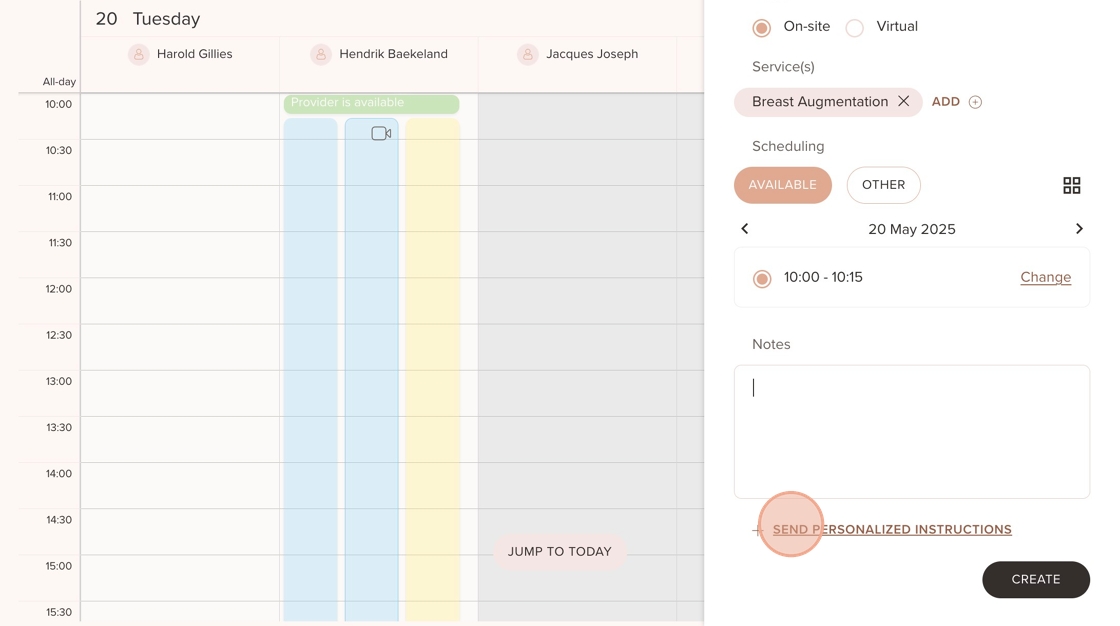
16. If you click on "Send personalized instructions," this will appear, allowing you to send any message you’d like the patient to read

17. Click on "Create" when you're finished

18. Click on "Create"

19. And here, you'll see the appointment

20. If you hover over the appointment, you’ll be able to view this information

Was this article helpful?
That’s Great!
Thank you for your feedback
Sorry! We couldn't be helpful
Thank you for your feedback
Feedback sent
We appreciate your effort and will try to fix the article