Create a Surgery Appointment
You can create an appointment with the same setup and functionality from three different areas in the platform:
- From the Dashboard View
- From the Schedule View
- Directly from the Patient 360
In this article, we’ll guide you through how to create a surgery appointment.
Previously, when we created a consultation appointment, we started from the Schedule View. This time, we’ll show you how to begin the process from the Dashboard View.
While creating consultation and surgery appointments is quite similar, there are a few additional options and important considerations when setting up a surgery appointment.
To book directly from a patient profile:
Go to Patient > Overview, select the patient, then in Patient 360, navigate to Bookings and click the ➕ icon.
Useful links
Understanding and managing Arrival time for Surgery: Understanding and Managing Arrival time for Surgery
Step-by-Step
1. Click the icon located in the top right corner

2. Start by selecting a patient. You can either click the arrow to open the dropdown or begin typing in the field to search

3. Choose the patient you'd like to book a surgery for

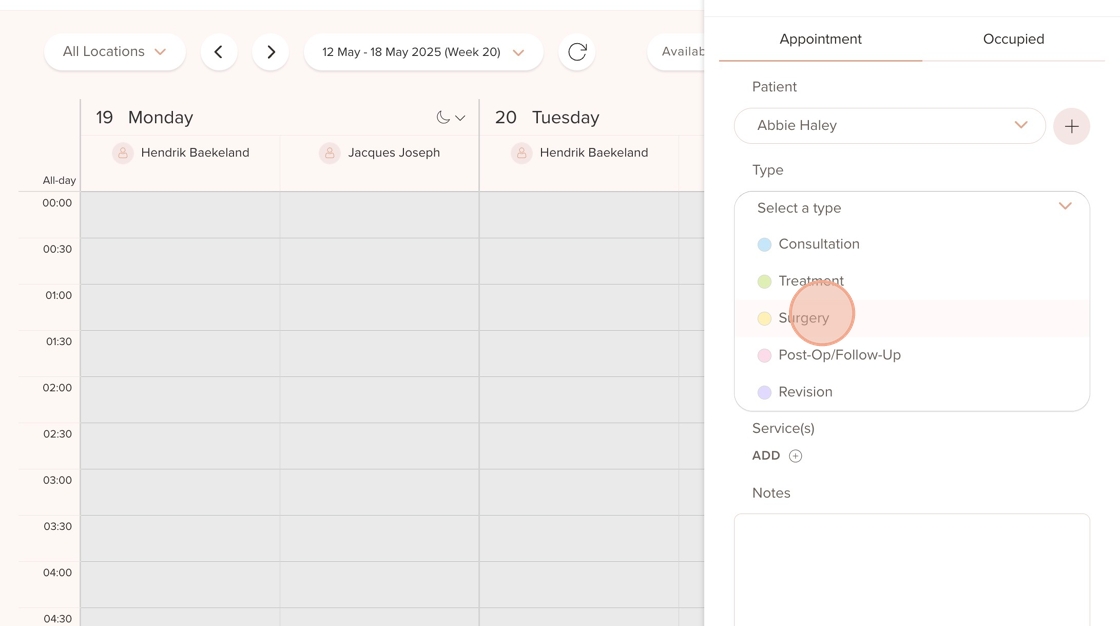
4. Go to the "Type" field and select the kind of appointment you are booking.

5. Click on "Location" to choose where you want to book the surgery

6. Choose the location

7. Continue to the "Provider" field and select the treatment provider

8. Here, you have the option to add additional providers.
For example, if more than one provider will be involved in performing the surgery and you want both of their schedules to be blocked and visible in the Schedule view, you can include them here.

9. Select another Treatment Provider and click on "Select Provider"

10. Click on "Add" under Service

11. Here, you'll find a list of all the services this treatment provider offers at the selected location

12. Under "Available," you'll see this treatment provider's availability. Select the date you'd like to book

13. Select a time

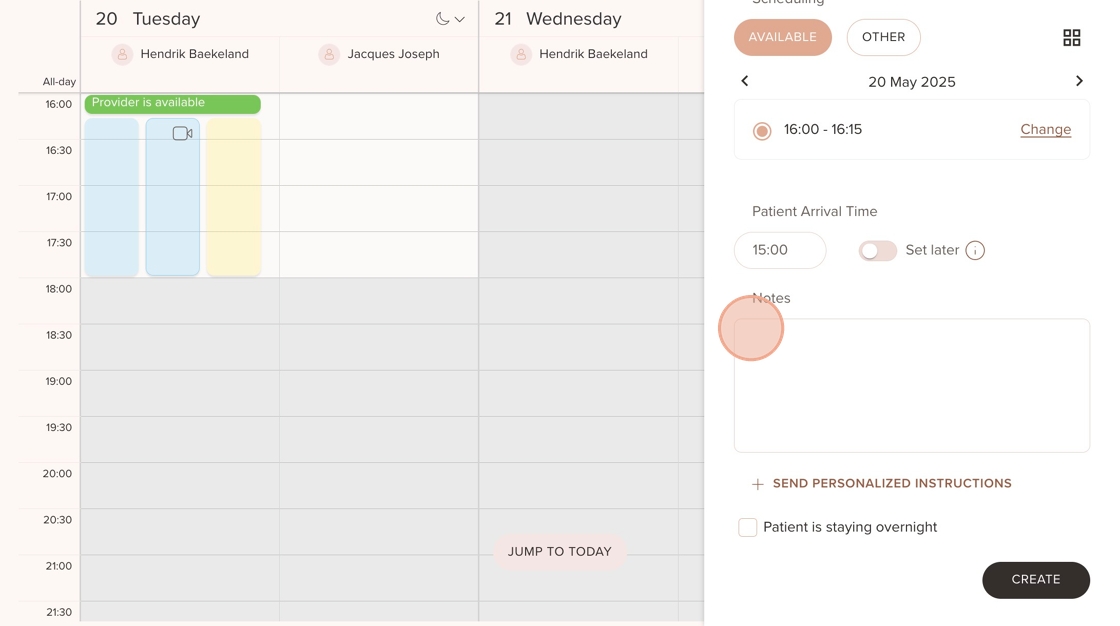
14. Here, you have the option to set a "Patient Arrival Time." This is the time the patient will be informed to arrive. By default, it is set to "Set later." If you leave it as such, you’ll receive a reminder in the Tasks section of the Dashboard two weeks before the surgery.
Alternatively, you can untick the box and set the arrival time immediately.

15. Let’s add a "Patient Arrival Time" of 15:00 — one hour before the actual surgery.
The patient will only receive information about the Arrival Time, not the Surgery Time, as the surgery may be postponed or subject to change

16. Here, you also have the option to indicate whether the patient will be staying overnight. This setting can be configured according to your clinic’s procedures

17. Just like when creating a consultation, you have the option to add Internal Notes under "Notes," or send instructions to the patient using "Send Personalized Instructions." Click on "Create" when you are finished

18. Click on "Create"

19. In the Schedule overview, the surgery will now appear as booked and will be visible to both treatment providers

20. When you hover over the surgery, you'll see a summary of the booking — including the arrival time you just set and the presence of an additional provider

Was this article helpful?
That’s Great!
Thank you for your feedback
Sorry! We couldn't be helpful
Thank you for your feedback
Feedback sent
We appreciate your effort and will try to fix the article