Add Personal and Role Information
In this article, you'll learn how to complete a team member's personal and role information. This step ensures their profile is accurate, professional, and properly configured for booking and visibility.
Once your team members are added to a clinic, you'll continue by configuring each of them individually. This includes:
- Services - Add a Service To a Treatment Provider
- Availability Setup - Set Up Provider Availability
Step-by-Step
1. Go to "Settings"

2. Click on "Team Management"
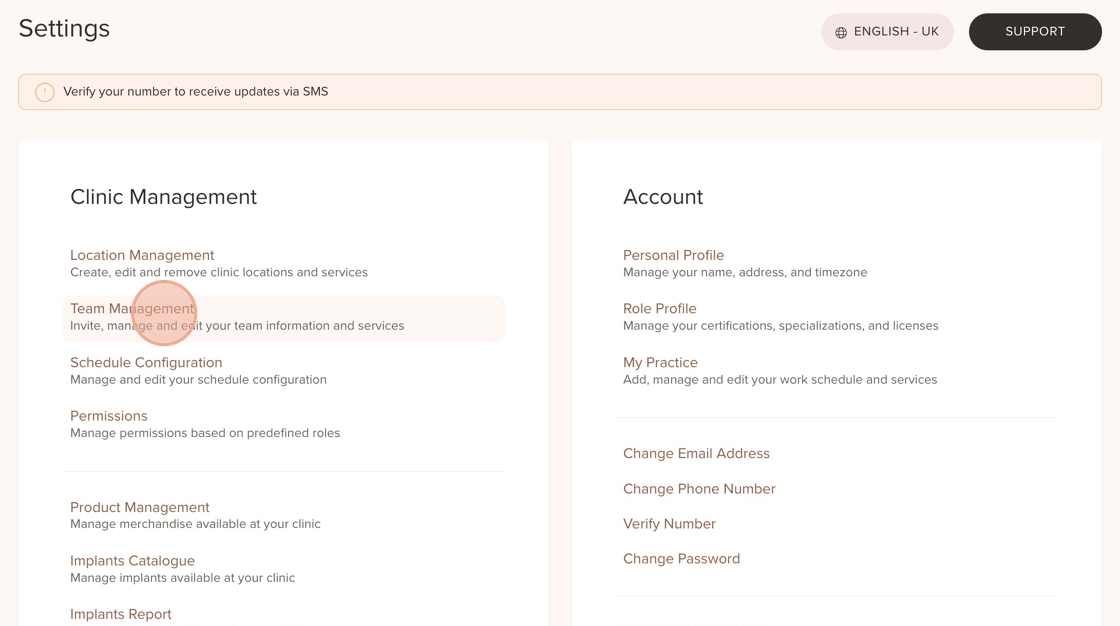
3. Click on the team member you want to edit

4. Use the toggle to make the team member visible in the marketplace
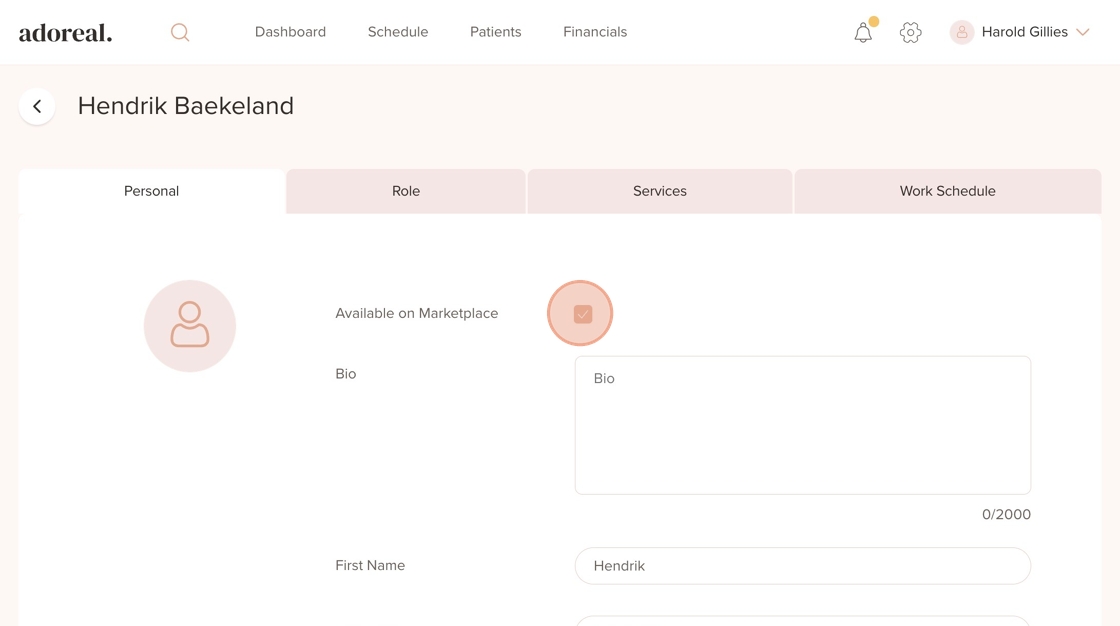
5. Click into the Bio field and begin entering their background, specialties, or introduction. Continue to add name, gender and languages

6. Select another Language from the drop down

7. Select one or more locations the team member is assigned to. This allows them to appear in the booking widget for those clinics

8. This step is essential — without assigning a location, you won’t be able to link services or set up availability for this provider

9. Open the “Role” Tab
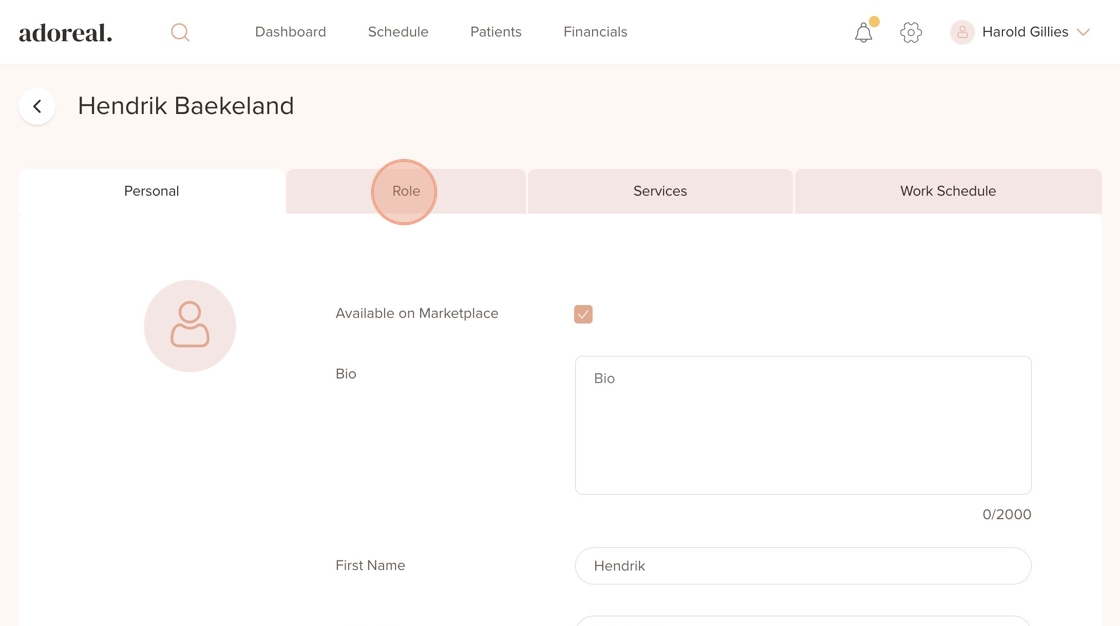
10. Add Role and Specialization information

11. Select a Specialization for this treatment provider

12. Click "Save" to confirm and apply all updates to the team member’s profile

Was this article helpful?
That’s Great!
Thank you for your feedback
Sorry! We couldn't be helpful
Thank you for your feedback
Feedback sent
We appreciate your effort and will try to fix the article