Add a New Service
This article will guide you through how to add a new service.
When adding a service, there are a few important steps you need to follow to ensure everything works correctly. The first step is to set up the service under a location. If your clinic has multiple locations, you’ll need to add the service separately for each one.
To have an overview of services, read this article: "Overview of Services"
⚠️ If a service is only added to a location it will not appear in the booking widget on your website. It has to also be assigned to a treatment provider. Please see links below.
Next Steps:
After assigning the service to the location, make sure to complete the following additional setup steps in this order:
- Assign your treatment providers to the correct locations. This is required before assigning services to them
- Assign the service to the appropriate provider(s) so they can be selected in bookings
- Add working hours for the provider. Only then will services become visible and bookable in the schedule and booking widget
If the service you want to add isn’t listed, you need to instead create a custom one by following this guide "How To Create a Customized Service"
Step-by-Step
1. Go to "Settings"

2. Click on "Location Management"

3. Choose the location where you want to add a service, then click on "View Details"

4. Click on "Services"

5. Click on "Add Service"
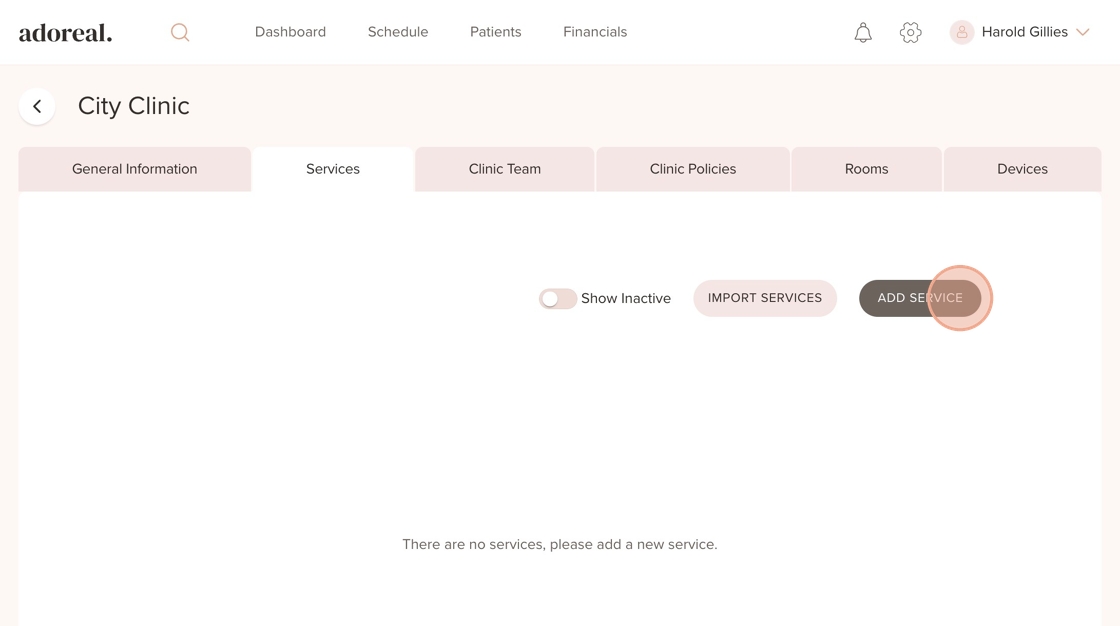
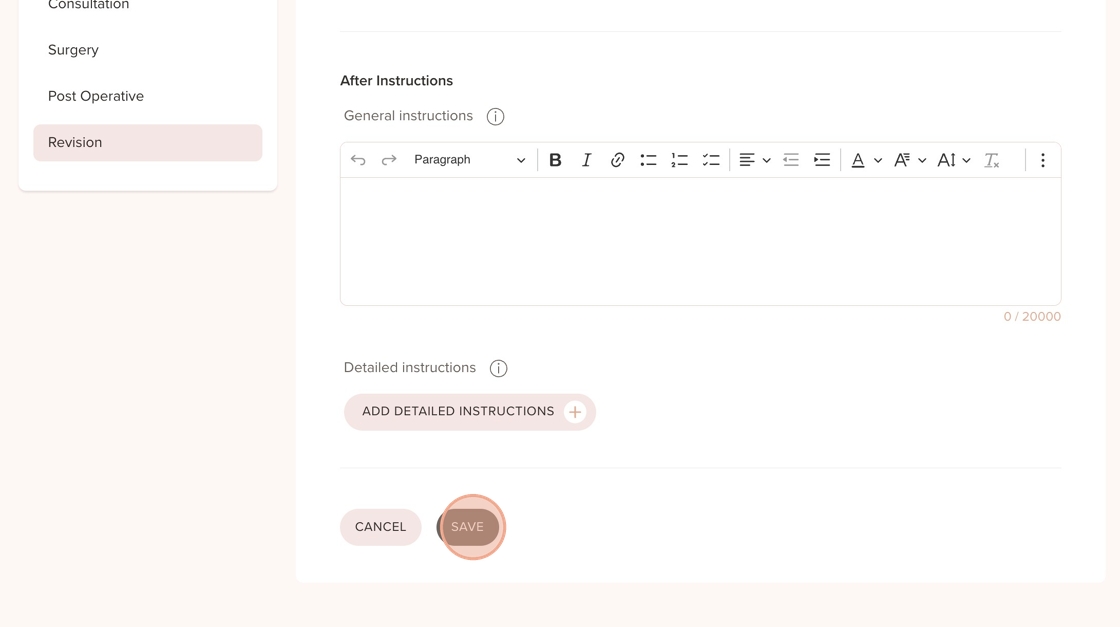
6. Select a service you'd like to add from the available categories

7. In this example, we'll choose the service "Breast Augmentation"

8. Click on "Add Service"

9. First, you will see the general information about the service. Here, you can choose whether you want the service to be active. If active, the service will be visible to you and your team under the list of services. You can also choose whether the service should be visible on the Marketplace—if this is ticked, the service will be visible to patients.

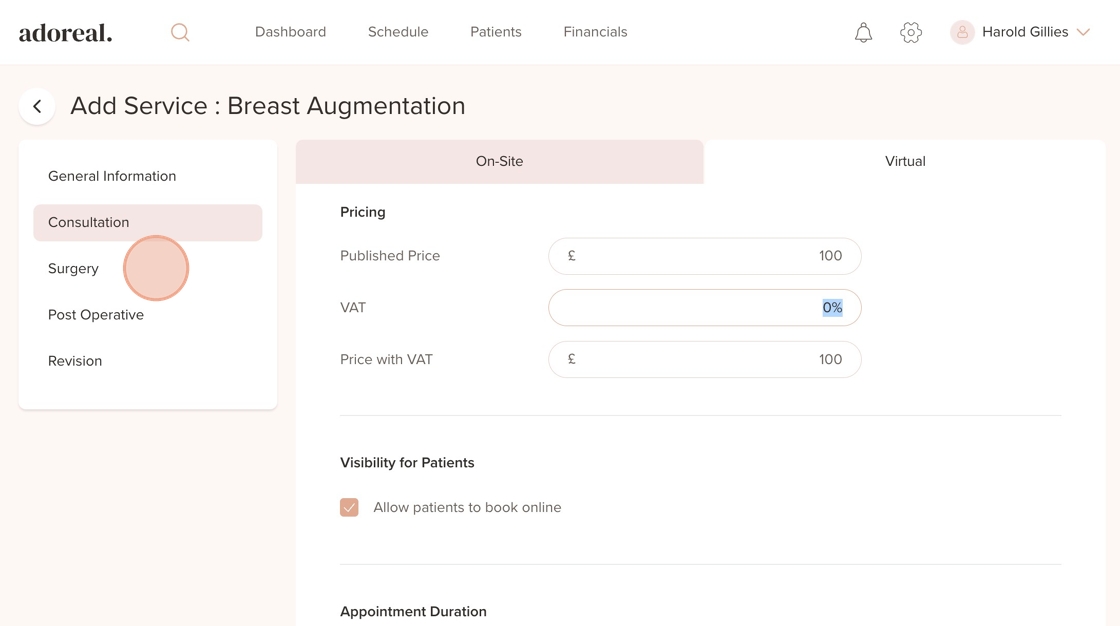
10. Make sure to go through the entire list on the left-hand side, starting with "Consultation"
⚠️ Tip! For each appointment type (e.g., Consultation, Surgery, Post-Operative, Revision), it's important to always review and complete the following details:
- Pricing – Set the correct price for the service.
- Time Duration – Make sure the length of the appointment is accurate.
- Before & After Instructions – Add general guidance visible to patients before and after their visit.
- Detailed Instructions – Include specific timing-based instructions (e.g., "1 day before consultation," "3 days after surgery," etc.) to help patients prepare and follow up correctly.

11. Here, you can add pricing for both "On-Site" and "Virtual" consultations.
You also have the option to make the consultation bookable online by patients by ticking the "Visibility for Patient" checkbox.

12. Continue to the "Virtual" section and repeat the same steps

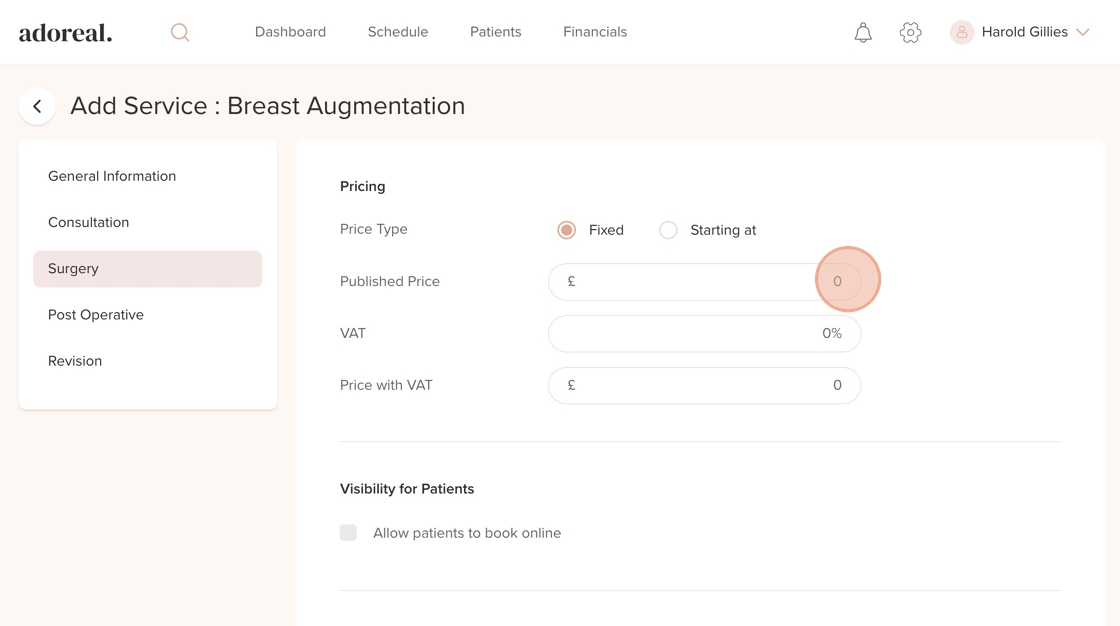
13. Next, Go to "Surgery". If your service is a treatment, this will show as "Treatment"
14. Select a price for the surgery. Here, you can choose between a fixed price or a starting price. By default, surgeries are not bookable online for patients.
15. Next, Go to "Post Operative". If your service is a treatment, it will show as Follow-up instead
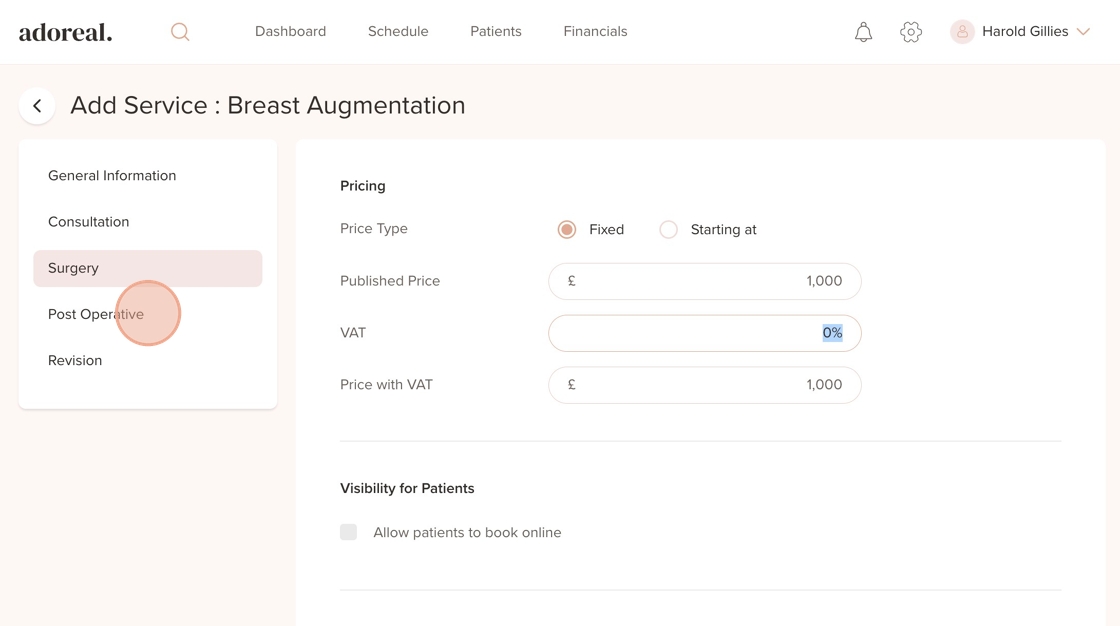
16. Follow the same steps here as you did for Consultations. Choose a price and decide whether you want the service to be bookable online for patients by toggling the visibility option. Then, repeat the same steps for the "Virtual" section.

17. Next, go to "Revision" and follow the same steps. Please note that this option is only available for Surgeries, not Treatments

18. When you are done click on "Save"
19. And last, click on "Confirm"

Was this article helpful?
That’s Great!
Thank you for your feedback
Sorry! We couldn't be helpful
Thank you for your feedback
Feedback sent
We appreciate your effort and will try to fix the article