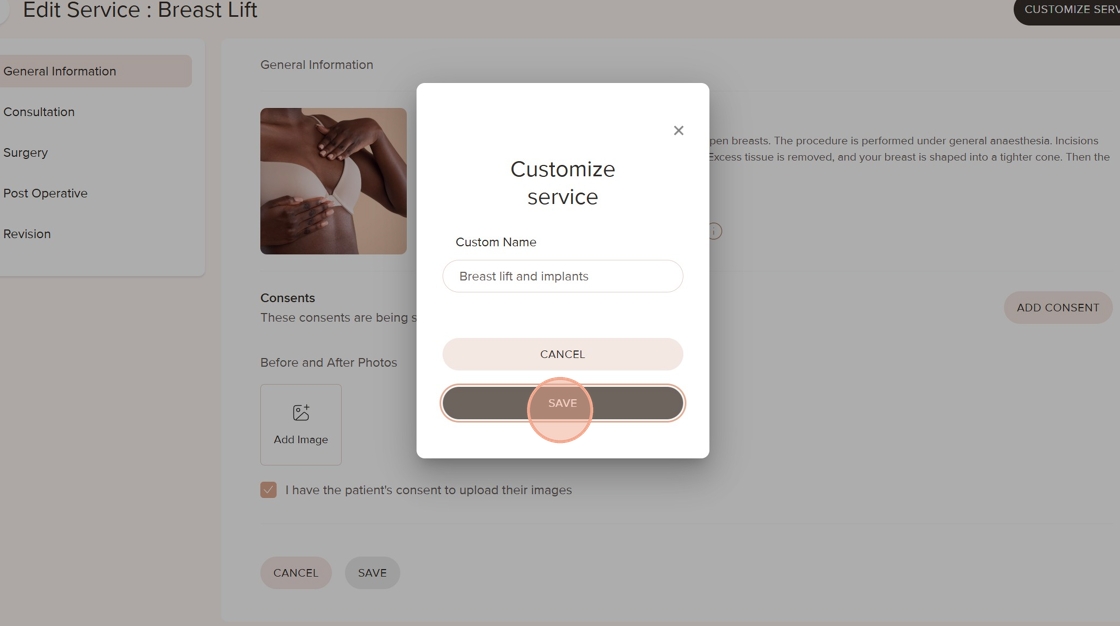
Create a Customized Service
If you want to offer a service that isn’t included in the default list, this guide will show you how to create a customized service.
There are a few important steps to follow, so be sure to go through them one by one. It’s essential to complete all the information for your customized service, just as you would for any other service you've added.
To make sure you don’t miss anything, check out "Add a Service To a Location" for a reminder of all the required steps.
Don’t forget to assign your customized service to a treatment provider once you're finished.
You can check out this article "Add a Service To a Treatment Provider" to learn how to do that.
Step-by-step
1. In the list of services for a location, find an existing service that is as closely related to the service you want to add. For example, if you want to add a breast-related service, choose "Breast augmentation" or "Breast lift".

2. Click on "View Details" on the service.

3. Click on "Customize Service"

4. Fill in the name of the service you want to add

5. Click on "Save"

6. Once the service has been added, you'll need to define its details, such as price and appointment duration, just as you would for a Default Service.
Don't forget to assign it to a Treatment Provider so that it's bookable.
Was this article helpful?
That’s Great!
Thank you for your feedback
Sorry! We couldn't be helpful
Thank you for your feedback
Feedback sent
We appreciate your effort and will try to fix the article